What Is the Best Ergonomic Desk Setup for Remote Workers?
A complete beginner-friendly guide to building an ergonomic desk setup that actually works for your body, and doesn’t look like a corporate cubicle.

Contents
- 1 The Real Problem With Most “Ergonomic” Advice
- 2 Why Your Current Setup Is Probably Hurting You
- 3 Start With the Foundation: Your Chair
- 4 Desk Height: The Most Overlooked Variable
- 5 Monitor Placement: Where Your Neck Lives or Dies
- 6 Input Devices: Your Hands Deserve Better
- 7 Lighting: The Invisible Productivity Killer
- 8 Cable Management: The Mental Health Factor
- 9 The Aesthetic Layer: Making It Yours Without Breaking the Bank
- 10 Building Your Setup in Stages (Budget-Friendly)
- 11 The “Cozy” Factor: Ergonomics Doesn’t Mean Clinical
- 12 Troubleshooting Common Problems
- 13 The Maintenance Nobody Talks About
- 14 When to Invest vs. When to Improvise
- 15 The Reality Check: Working With What You Have
- 16 Bringing It All Together: Your Action Plan
- 17 Final Thoughts: Comfort Is the Ultimate Productivity Hack
The Real Problem With Most “Ergonomic” Advice
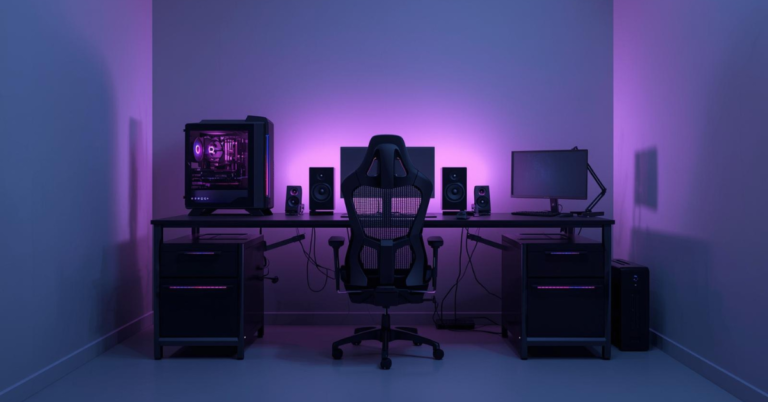
You’ve probably seen those pristine desk setups on Instagram. You know the ones, ultra-wide monitors floating in mid-air, mechanical keyboards that cost more than your monthly grocery bill, and cable management so perfect it looks computer-generated.
Here’s the thing: most of that advice misses the mark for actual remote workers.
I’ve been tweaking my own ergonomic desk setup for five years now, and I’ve gone through the phase of buying every gadget imaginable. I’ve also spent months working from a kitchen table when I had to. What I’ve learned is that ergonomics isn’t about perfection; it’s about sustainable comfort that keeps you productive without destroying your body.
Remote workers face unique challenges. Your “office” might be a corner of your bedroom. You might share space with a partner who also works from home. Or you’re dealing with the transition from a corporate office that had an ergonomics team to… well, you figuring it out alone.
This guide cuts through the noise. We’ll build a home office ergonomic setup that prioritizes your health first, looks good second, and doesn’t require a complete room renovation.
Why Your Current Setup Is Probably Hurting You
Before we fix anything, let’s talk about what happens when you ignore ergonomics.
I ignored it for my first year of remote work. I thought, “I’m young, I’m fine, I’ll just stretch later.” Then I started getting headaches that wouldn’t quit. My shoulders felt like they were carrying bricks. And that tingling in my fingers? Turns out that’s not normal.
The hard truth: Poor desk ergonomics don’t announce themselves immediately. They creep in. By the time you notice the pain, you’ve already developed habits that are tough to break.
When your monitor sits too low, you crane your neck forward. Do that for eight hours, and your cervical spine starts complaining. When your keyboard forces your wrists into extension, you compress the median nerve. Hello, carpal tunnel symptoms.
The worst part? Most people compensate without realizing it. You shift in your chair, hunch, and You crane. Your body tries to adapt to bad equipment instead of the equipment adapting to you.
That’s backwards. And it’s exactly why we need to rethink the ergonomic desk setup from the ground up.
Start With the Foundation: Your Chair
If you only invest in one thing, make it the chair, the cornerstone of your ergonomic desk setup process.
I learned this the expensive way. I spent $800 on a monitor before I had a decent chair. Big mistake. You can prop up a cheap monitor with books. You can’t fake lumbar support with a pillow long-term.
What to look for:
- Adjustable seat height: Your feet should rest flat on the floor with knees at roughly 90 degrees. If you’re shorter, get a footrest. Don’t let your legs dangle.
- Lumbar support that actually fits: The curve should hit your lower back, not your mid-back. Everyone’s spine is different, so adjustable lumbar is worth the extra cost.
- Seat depth adjustment: You want 2-3 fingers’ width between the back of your knees and the seat edge. Too deep, and you cut off circulation. Too shallow, and you lose thigh support.
You don’t need to spend Herman Miller money. Brands like HON, Steelcase Series 1, or even well-reviewed Amazon basics can work if they hit those three criteria. I used a $250 chair for two years that served me perfectly.
The test: Sit in it for 30 minutes before committing. Your body knows immediately what your brain tries to justify later.
Desk Height: The Most Overlooked Variable
Here’s a number that might surprise you: most standard desks are 29-30 inches high. That’s based on data from the 1960s when the average male was 5’9″.
If you’re not 5’9″ with average proportions, that desk is wrong for you.
An adjustable desk setup isn’t just a nice-to-have anymore, it’s essential for remote work longevity. But before you panic about buying a standing desk, know that you have options.
Fixed desk solutions:
- If your desk is too high: Use a keyboard tray to bring your input devices down, or raise your chair and add a footrest
- If your desk is too low: Bed risers work surprisingly well under desk legs, or you can use desk risers specifically made for this
Standing desk considerations:
I switched to a sit-stand desk three years ago. Not because standing all day is better (it’s not, standing too much causes its own problems), but because variation saves your body.
The sweet spot is changing positions every 45-60 minutes. Stand for a call, sit for deep work, stand while reading emails. Your discs need to decompress, and movement stimulates blood flow.
Budget hack: Manual crank desks are half the price of electric ones and last longer. The 30 seconds of cranking is actually a nice movement break.
Monitor Placement: Where Your Neck Lives or Dies
Your monitor position determines your neck position. Your neck position determines whether you get tension headaches at 3 PM. It’s that simple.
The rules:
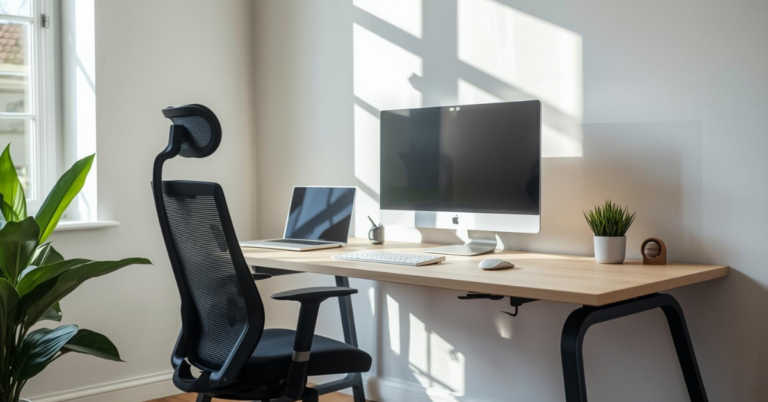
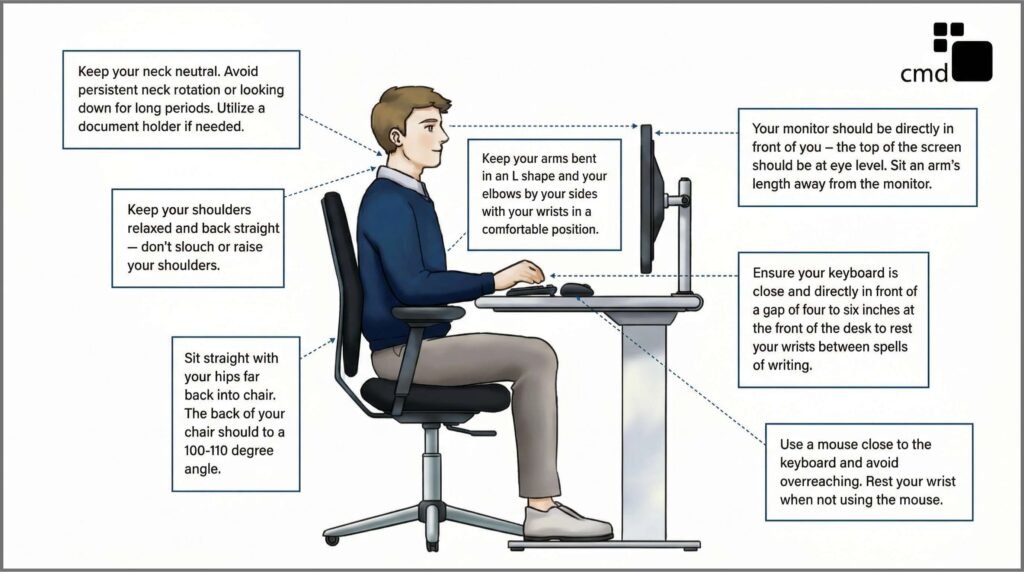
Height: The top of your screen should be at or slightly below eye level. You should be looking slightly downward, not up. Looking up dries out your eyes and compresses your cervical vertebrae.
Distance: Arm’s length away, roughly 20-26 inches. If you find yourself leaning forward to read text, increase the font size or get glasses. Leaning forward destroys your upper back.
Angle: Tilt the top back slightly, about 10-20 degrees. This matches the natural angle of your gaze when sitting upright.
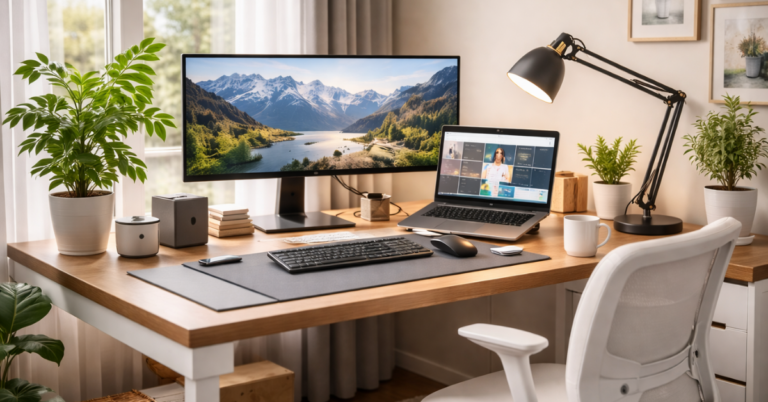
Multiple monitors: If you use two screens, place them side by side with no gap. The center of your primary monitor should be directly in front of you. Don’t put one monitor off to the side and twist your neck all day, that’s a one-way ticket to chronic pain.
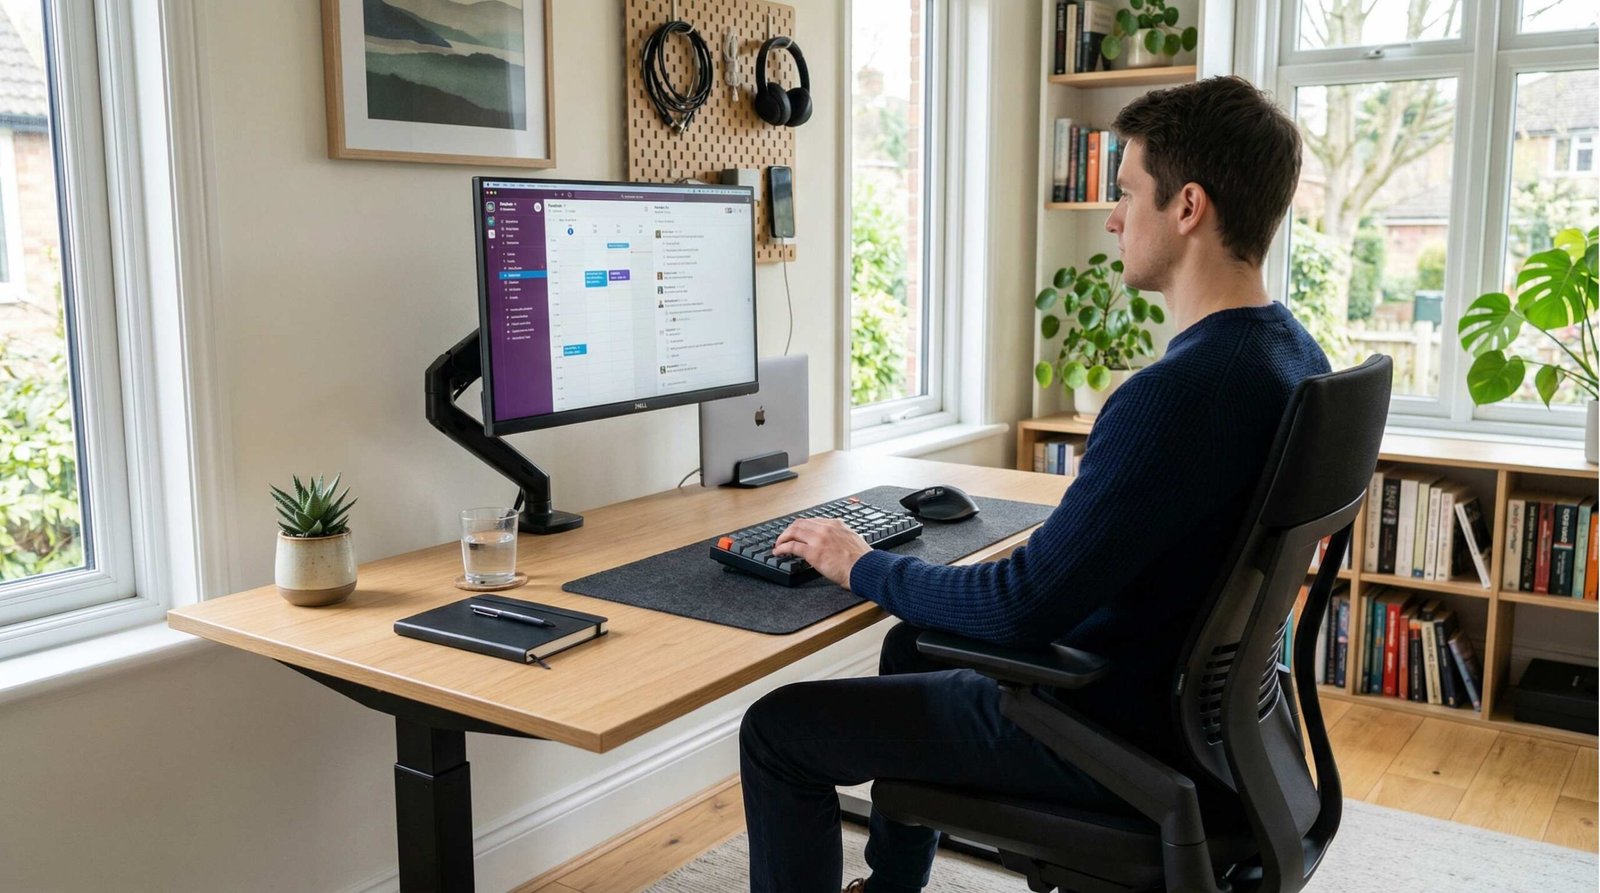
The laptop problem: Laptops are terrible for ergonomics. The screen is too low and the keyboard is too close together. If you use a laptop as your primary machine, get an external monitor, or at minimum, a laptop stand and external keyboard.
I fought this for months. “I’ll just work on the couch sometimes,” I told myself. That sometimes became always, and my posture suffered. Commit to treating your laptop like a desktop when you’re at your desk.
Input Devices: Your Hands Deserve Better
We abuse our hands. We type for hours, click thousands of times, and wonder why our wrists ache.
Keyboard positioning: Your keyboard should sit so your elbows stay at 90 degrees, close to your body. Your wrists should float, not rest on a pad. That “wrist rest” that came with your keyboard? It’s actually a palm rest for when you’re not typing. Resting your wrists while typing compresses the carpal tunnel.
Mouse placement: Keep it at the same height as your keyboard and directly beside it. Reaching forward or to the side for your mouse stresses your shoulder. I use a compact keyboard with no number pad specifically so my mouse stays closer to my body.
Consider alternatives: Vertical mice, trackballs, or ergonomic keyboards aren’t gimmicks. They reduce pronation (palm-down position) that strains forearm muscles. I switched to a vertical mouse after developing tendonitis, and the relief was immediate.
The mechanical keyboard debate: You don’t need one. But if you type a lot, consider switches that don’t bottom out hard. Your fingers absorb less impact. I use Cherry MX Browns, tactile but not clicky, and they don’t require slamming the keys to register.
Lighting: The Invisible Productivity Killer

Bad lighting creates eye strain. Eye strain creates headaches. Headaches make you hate your job. It’s a cascade that starts with your light source.
Natural light first: Position your desk perpendicular to windows if possible. You get the benefits of daylight without direct glare on your screen. Direct sunlight behind you creates screen glare; direct sunlight in front of you makes you squint.
Artificial light layers:
- Ambient light: Overhead lighting that fills the room without being harsh
- Task light: A desk lamp focused on your work area
- Bias lighting: Light behind your monitor that reduces eye strain by balancing the brightness difference between your screen and the wall behind it
Color temperature matters: Cool light (5000K+) keeps you alert. Warm light (2700K-3000K) helps you wind down. Use cool light during work hours, warm light in the evening. I use smart bulbs that shift automatically, game changer for my sleep quality.
The screen glare test: Turn off your monitor. If you can see reflections of windows or lights in the black screen, your lighting needs adjustment. You shouldn’t be fighting reflections while trying to read text.
Cable Management: The Mental Health Factor
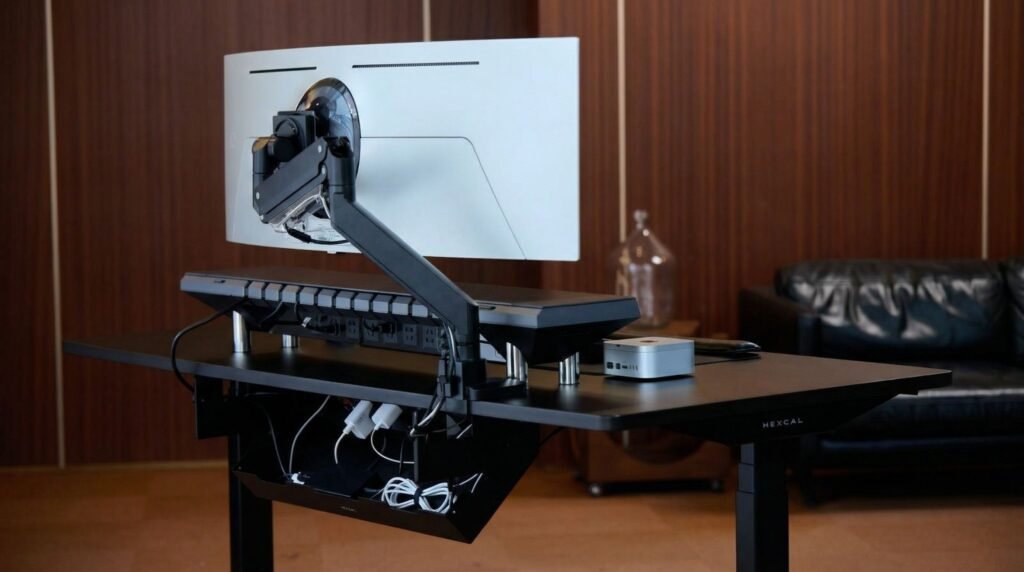
This sounds like an aesthetic concern, but it’s not. Visible clutter increases cognitive load. Your brain processes every cable it sees, even if you’re not consciously aware of it.
I didn’t believe this until I cleaned up my cables. The difference in how calm I felt sitting down to work was immediate. It’s like the difference between a messy kitchen and a clean one, you can cook in both, but one makes you tense.
The practical approach:
Under the desk: Use a cable tray or raceway. Screw it to the underside and run everything through it. Power strips go here too, not on the floor.
On the desk: Route cables through monitor arms or desk grommets. Use velcro ties, not zip ties, you’ll need to adjust things later.
The “one cable” rule: Each device should have one visible cable entering your workspace. If you see a rat’s nest every time you sit down, you’ll avoid sitting down.
Wireless where it makes sense: I use a wireless keyboard and mouse not because I love charging batteries, but because it eliminates two cables from my sightlines. The charging happens overnight, and I never think about it.
Don’t over-engineer: You don’t need custom-sleeved cables or color-coordinated everything. You just need them hidden and organized. A $10 cable management kit from Amazon works fine.
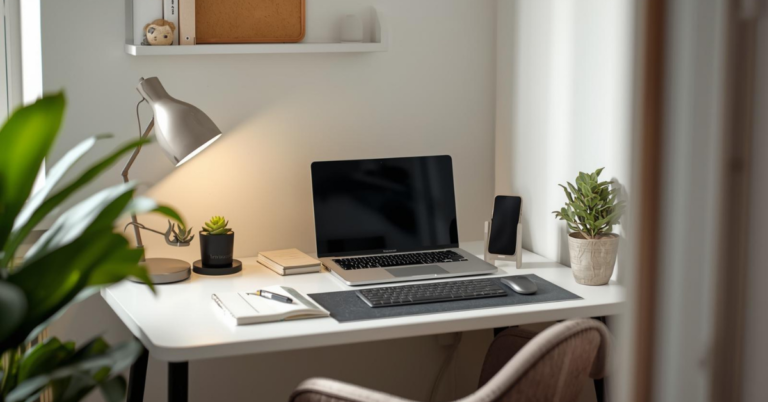
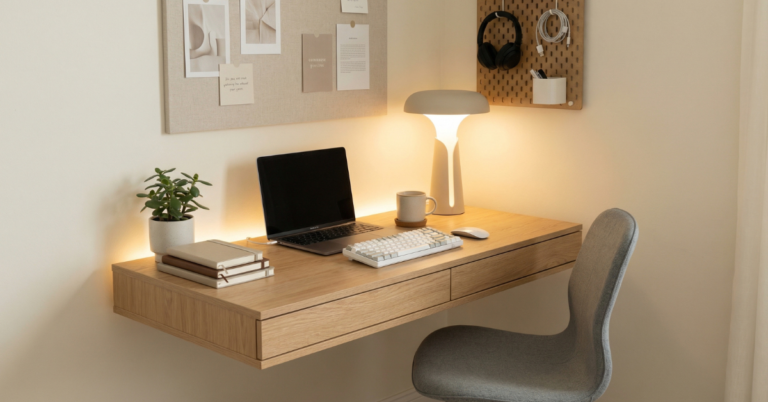
The Aesthetic Layer: Making It Yours Without Breaking the Bank
Here’s where people get lost. They see those perfect setups online and think they need to spend thousands on matching wood tones and artisan keycaps.
You don’t. But you should care about how your space looks, because you spend 40+ hours a week looking at it.
The cohesive look comes from restraint, not expense:
Pick two materials and one accent color. Mine is light wood, white, and green (plants). Everything I add fits that palette. My desk is light oak, my monitor arm is white, my planters are white ceramic.
Plants are magic: They add life, improve air quality marginally, and give your eyes something to rest on that’s not a screen. Start with a pothos or snake plant, unkillable, low-light tolerant, and they look great.
Personal items with intention: One framed photo. One small object that makes you smile. Not fifteen. Curated minimalism beats cluttered “cozy” every time for focus.
The desk mat trick: A large felt or leather desk mat unifies your space instantly. It covers ugly desk surfaces, dampens sound, and defines your work zone. $30, massive impact.
Avoid the RGB trap: Colored LED lights look cool in photos and distracting in reality. If you must, keep them warm white or very subtle. Your eyes will thank you during long work sessions.
Building Your Setup in Stages (Budget-Friendly)
Not everyone can drop $2,000 on a desk overhaul. Here’s how I built mine over six months:
Month 1: Chair ($250) and monitor arm ($100). These fixed my immediate pain points.
Month 2: Standing desk frame ($300), kept my existing desktop. This let me vary my position.
Month 3: External monitor ($300) and basic cable management ($50). My laptop became a secondary screen.
Month 4: Desk mat, plants, lighting ($100 total). The space started feeling intentional.
Month 5-6: Ergonomic keyboard and vertical mouse ($200). Fine-tuning input devices came last because they’re easiest to swap later.
Total: Around $1,300 spread over half a year. Less than a month’s rent in most cities, and it transformed my daily experience.
If you have $500 total: Spend $300 on the chair, $100 on a monitor arm, $50 on cable management, $50 on a desk mat. Upgrade the desk later.
If you have $200 total: Buy a footrest, a laptop stand, an external keyboard, and a mouse. Fix your posture with positioning, not furniture.
The “Cozy” Factor: Ergonomics Doesn’t Mean Clinical
There’s a misconception that ergonomic spaces look like hospital rooms. They don’t have to.
The best ergonomic desk setup feels like a place you want to be. That means:
- Texture: A woven desk mat instead of cold laminate
- Warmth: Wood tones, soft textiles, ambient lighting
- Life: Plants, natural materials, maybe a small fountain for white noise
- Personal touch: That one weird object that makes you smile
I have a small ceramic bird on my desk that my grandmother gave me. It has nothing to do with productivity. But seeing it reminds me why I work, to have a life outside this room. That matters.
Temperature and air: A small fan or space heater keeps you comfortable without adjusting the whole house. Stuffy rooms kill focus faster than bad chairs.
Sound management: If you can’t control ambient noise, noise-canceling headphones are ergonomic equipment. Constant low-level stress from noise is still stress.
Troubleshooting Common Problems
“My neck hurts even with a monitor arm.”
Check the height. Most people set monitors too high. The top of the screen should be at eye level or slightly below. Also, check the distance; you might be leaning forward.
“My lower back aches in my expensive ergonomic chair.”
Adjust the lumbar support position. It should hit your belt line, not higher. Also, check seat depth; you might be sitting too far back or forward.
“My wrists hurt even with a wrist rest.”
Stop resting your wrists while typing. Float your hands. The rest is for breaks between typing, not support during.
“I get headaches every afternoon.”
Check lighting glare and screen brightness. Your screen should match ambient light, not blast brighter. Also, check hydration; dehydration mimics eye strain.
“I can’t focus in my ‘optimized’ space.”
You might have optimized for aesthetics over function. Remove distracting elements. Add one personal item back. Ergonomics serves productivity, not the other way around.
The Maintenance Nobody Talks About
Your home office ergonomic setup isn’t “set and forget.” Bodies change. Equipment wears out. What worked last year might not work now.
Monthly checks:
- Are cables staying managed, or creeping back into view?
- Is your chair still supporting you, or has the cushion compressed?
- Are you maintaining good posture, or sliding into old habits?
Seasonal adjustments:
- Winter: Add a humidifier, adjust lighting for shorter days
- Summer: Check for sun glare as the sun’s position changes
- Spring: Clean everything thoroughly, reassess plant health
Annual overhaul:
Once a year, I completely clear my desk and rebuild. It’s amazing what accumulates: sticky notes, dead pens, random cables. Starting fresh reminds me why I designed the space this way.
When to Invest vs. When to Improvise
Not every problem needs a purchase. Sometimes the best ergonomic desk setup hack is free.
Improvise:
- Monitor too low? Stack books underneath. Works perfectly.
- Feet don’t reach the floor? A cardboard box is a fine footrest temporarily.
- Glare on screen? Reposition the desk or add a $10 window film.
Invest Anything:
- You touch for 8 hours daily (chair, keyboard, mouse)
- That affects your long-term health (monitor position, lighting)
- That reduces daily friction (cable management, desk organization)
The $5 rule: If a $5 fix solves the problem for a month, try it before buying the $50 version. But if the $5 fix breaks or annoys you, upgrade immediately. Friction costs more than money.
The Reality Check: Working With What You Have
I need to say this clearly: You don’t need a dedicated room. You don’t need expensive furniture. You don’t need to wait until you “have the space.”
I’ve seen incredible ergonomic desk setup in closets, corners of living rooms, and even converted walk-in closets. The principles matter more than the square footage.
Small space strategies for the best ergonomic desk setup:
- Wall-mounted desks fold away when not in use
- Vertical storage keeps floor space clear
- Good lighting matters more in dark corners
- Plants can hang if surface space is limited
Shared space boundaries:
- Room dividers or bookshelves create psychological separation
- Headphones signal “do not disturb” without words
- A desk mat defines “work zone” vs. “living zone” even on a shared table
The mental shift: Your workspace doesn’t need to be perfect. It needs to be better than yesterday. Incremental improvement beats waiting for ideal conditions.
Bringing It All Together: Your Action Plan
If you remember nothing else, remember this sequence:
- Fix your posture first—chair height, monitor position, keyboard placement
- Add movement second—standing desk, position changes, stretching
- Refine aesthetics third—cable management, lighting, personal touches
- Maintain consistently—monthly checks, seasonal adjustments, annual refreshes
Start where you are. Use what you have. Do what you can.
The best ergonomic desk setup is the one you’ll actually use. A perfect configuration that feels sterile and unwelcoming will fail. A slightly imperfect space that feels like yours will succeed.
Final Thoughts: Comfort Is the Ultimate Productivity Hack
After five years of tweaking, buying, selling, and rebuilding, here’s what I know for sure:
Aesthetics are nice. Gadgets are fun. But comfort is non-negotiable.
Your body doesn’t care about your Instagram likes. It cares about sustainable positions, regular movement, and reduced strain. When you get those right, everything else follows.
The trends will change. Next year it’ll be some new monitor shape or desk material. The fundamentals won’t change: Support your spine. Position your screen. Move your body. Rest your eyes.
Build a space that works with your body, not against it. Make it pleasant enough that you want to be there, functional enough that you can focus, and flexible enough to adapt as you change.
Your future self, the one who still needs to work in ten, twenty, or thirty years, will thank you for starting today.
Not with a perfect setup. With a better one.
Ready to transform your workspace? Start your ergonomic desk setup journey with one change this week. Just one. See how it feels. Then build from there.